User Interface: Time Machine
Using the Time Machine
To access the Time Machine, click on the view menu in the top bar and select the Time Machine icon.
The Time Machine view in Agent DVR functions similarly to the live view but plays back synchronized recordings from your devices instead of live streams. Utilize the timeline control at the bottom of the Time Machine to select a playback time.
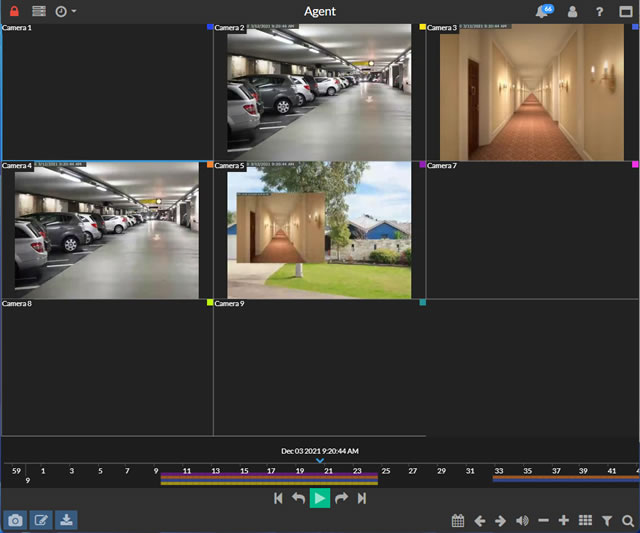
To choose a playback time, click and drag the timeline at the bottom to your desired moment and click the Play icon that appears. The Time Machine will automatically align with the next available recording. Zoom in and out of the timeline using the mouse wheel, zoom controls, or a pinch gesture on touch devices.
The colored bars on the timeline represent the number of devices with recordings at that specific time.
Much like the live view, you can zoom into recordings with the mouse wheel or pinch gestures and pan around with touch or mouse movements.
The timeline scrolls automatically with the playing video. Control playback using the buttons beneath the timeline:
- Skip to the previous recording for the selected device.
- Skip back 10 seconds.
- Pause the video. When paused, you can take photos, zoom, pan, and download clips.
- Skip forward 10 seconds.
- Skip to the next recording for the selected device.
Tips and Tricks
- The timeline shows color blocks corresponding to each device's color (set in the general tab when editing a device). Playback controls have colored boxes linking them to devices on the timeline. Enable labels in Account - UI Settings to display device names.
- Alert and Motion slots display live events only, so their content won't appear in the Time Machine.
- Scrubbing the Time Machine can use a lot of CPU as Agent DVR tries to keep all the recordings in sync. If you have problems using it try disabling Time Machine Scrubbing in User Interface.
- To maximize a device, click on it then click again. On mobile, swipe left/right to cycle through views.
- Click on a device to select it. Use the bottom left controls to take photos from recordings, edit recordings, or download them.
- Use the bottom right tools to jump to the current time on the timeline, navigate views, control audio, zoom in/out of the timeline, select a view, or search and filter recordings. Filters highlight matching recordings on the timeline with a colored circle.