User Interface: Virtual Reality
About VR Mode
To access Virtual Reality, click on the view menu in the top bar and select the Virtual Reality icon.
🕶️ VR mode in Agent DVR uses the cameras from your configured views in live mode to arrange cameras in a Virtual Reality or 3D environment. To see cameras in VR, you need to configure at least one view in the live viewer. The VR viewer uses the same views as the live viewer.
Using Virtual Reality
If you have a compatible VR device, the UI offers an immersive VR mode.
To select a camera, point at it with your controller and press the trigger. Press again on the same camera to toggle between maximised and normal view.
To teleport, point at the floor and press the trigger to move to that position.
If you have a game pad you can use the left stick to move around the room and the right stick to look around. Use the D-Pad to pan and tilt a PTZ camera and the triggers to zoom in and out.
To exit VR, walk through the doorway on the left wall or press Escape.
Using Mouse and Keyboard
Click the VR canvas to capture the mouse — you can then look around by moving it. Press Escape to release the mouse without exiting VR.
Use the Arrow Keys to move around the room. Diagonal movement is supported by holding two arrow keys together. A blue dot appears when your cursor is over something interactive. Left click or press Space to interact. Mouse wheel will zoom in and out the selected camera.
To exit VR, walk through the doorway on the left wall, or press Escape while the mouse is not captured.
Additional keyboard shortcuts (you can configure these via the key manager in account menu):
| Key | Action |
|---|---|
| Space | Select / interact (same as left click) |
| Enter | Show / hide the control panel |
| Escape | Release mouse lock / exit VR |
| O | Toggle power on selected device |
| R | Toggle recording on selected device |
| G | Take a photo on selected device |
| T | Trigger a manual alert on selected device |
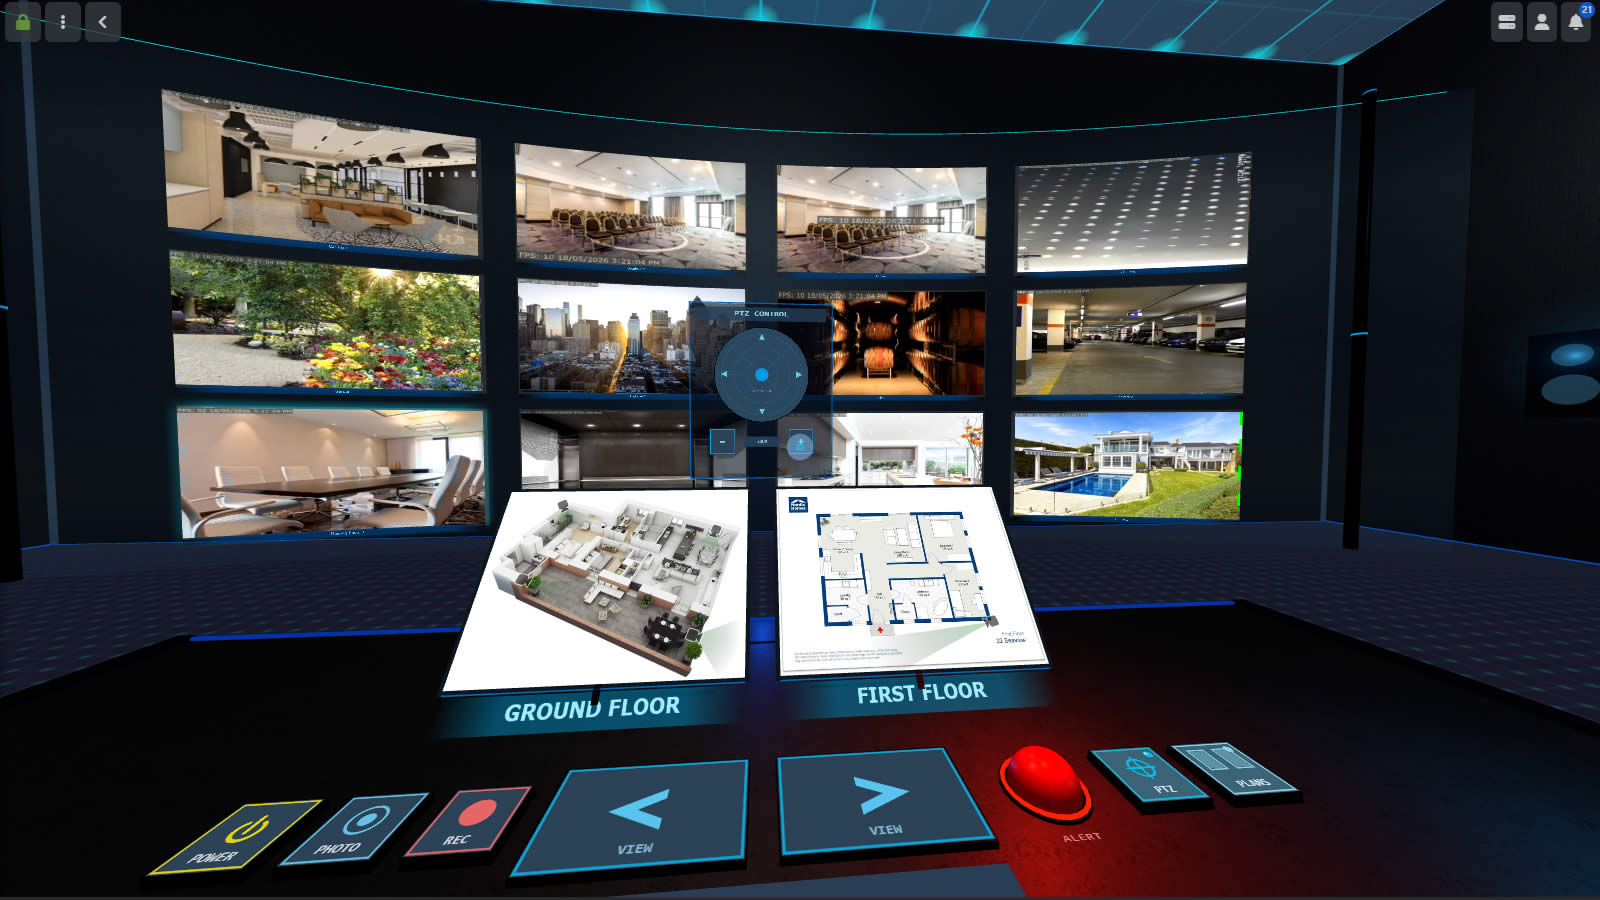
Using the Control Panel
Once you have a camera selected (by clicking on it) you will see a glowing border around it and you can interact with it via the control panel.
Use the main control desk to interact with the selected device. There are buttons on the desk to switch power, take photos, start and stop recording or trigger manual alerts.
Use the two main left and right arrow controls to cycle through configured views. Views appear only if they have devices set.
Use the two toggle buttons on the right to pop up configured floor plans as separate monitors and an overlay PTZ controller.
A red marker in the top right corner signifies recording, and a red border indicates an alert.
Press Enter to show or hide the control panel at any time.
Notes
VR mode requires an SSL connection if you are not running on localhost or via the web portal.
Immersive VR requires a browser with WebXR support. Current versions of Chrome and Firefox support WebXR without any additional configuration. Ensure SteamVR is running before launching if you are using a PC-tethered headset.
Mobile support requires Android O+ and varies on iOS depending on specific OS/hardware versions.
👓 VR mode has been tested on the Vive and Google Cardboard. If you've successfully used it on other devices, please let us know.